How to edit Microsoft Word documents in Python
Published on 29th of August, 2021.
In preparation for the job market, I started polishing my CV. I try to keep the CV on my website as up-to-date as possible, but many recruiters and companies prefer a single-page neat CV in a Microsoft Word document. I used to always make my CV’s in LaTeX, but it seems Word is often preferred since it’s easier to edit for third parties.
Keeping both a web, Word, and PDF version all up-to-date and easy to edit seemed like an annoying task. I have plenty experience with automatically generating PDF documents using LaTeX and Python, so I figured why should a Word document be any different? Let’s dive into the world of editing Word documents in Python!
Fortunately there is a library for this:
from docx import Document

document = Document("resume.docx")
paragraph = document.paragraphs[0]
print(paragraph.text)
Output
Rik Voorhaar
Turns out the first paragraph contains my name! Editing this text is very easy; we just need to set a new value to the
paragraph.text = "Willem Hendrik"
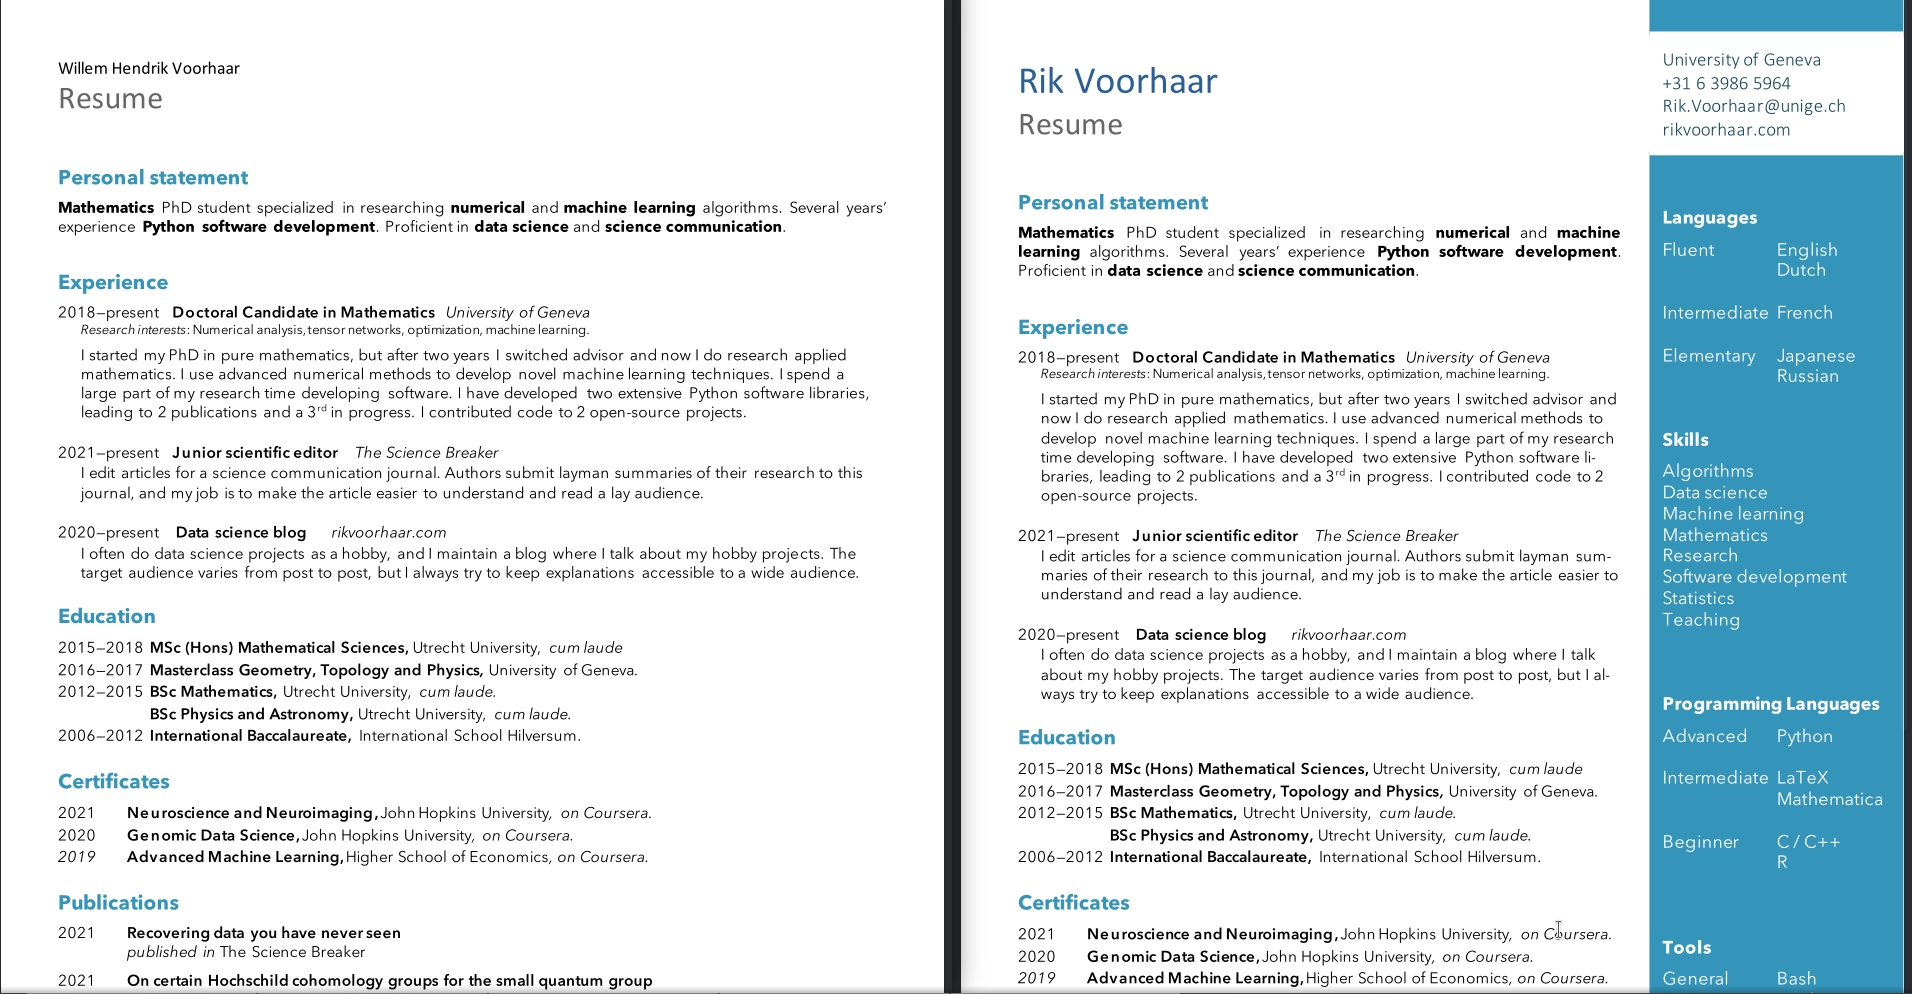
document.save("resume_edited.docx")Below is a picture of the resulting change; it unfortunately seems like two additional things happened when editing this paragraph: the font of the edited paragraph changed, and the bar / text box on the right-hand side disappeared completely!
This is no good, but to understand what happened to the text box we need to dig into the XML of the document. We can turn the document into an XML file like so:
document = Document("resume.docx")
with open('resume.xml', 'w') as f:
	f.write(document._element.xml)
It seems the problem was that the text box on the right was nested inside an other object, which is apparently not handled properly. This issue was easy to fix by modifying the Word document. However, the right bar on the side consists of 2 text boxes, and the top box with my contact information does disappear if I change the first paragraph. But, it does not disappear if I change the second paragraph; it only happens if I change paragraph 1 or 3 (and the latter is empty). I tried inserting two paragraphs before this particular paragraph, or changing the style of this particular paragraph, but the issue remains.
Looking at the XML the issue is clear: the text box element lies nested inside this paragraph! It turned out to be a bit tricky to avoid this, so for now let us then try changing the second paragraph, changing the word “resume” for “curriculum vitae”.
document = Document("resume.docx")
paragraph = document.paragraphs[1]
print(paragraph.text)
paragraph.text = "Curriculum Vitae"
document.save("CV.docx")
Output
Resume
If we do this there’s no problems with text boxes disappearing, but unfortunately the style of this paragraph is still reset when we do this. Let’s have a look at how the XML changes when we edit this paragraph. Ignoring irrelevant information, before changing it looks like this:
<w:p>
    <w:r>
    <w:t>R</w:t>
    </w:r>
    <w:r>
    <w:t>esume</w:t>
    </w:r>
</w:p>
And afterwards it looks like this:
<w:p>
    <w:r>
    <w:t>Curriculum Vitae</w:t>
    </w:r>
</w:p>
In Word, each paragraph (
Looking at the source code of
document = Document("resume.docx")
with open('resume.xml', 'w') as f:
	f.write(document._element.xml)

# Change 'Rik Voorhaar' for 'Willem Hendrik Voorhaar'
paragraph = document.paragraphs[0]
run = paragraph.runs[1]
run.text = 'Willem Hendrik Voorhaar'

# Change 'Resume' for 'Curriculum Vitae'
paragraph = document.paragraphs[1]
run = paragraph.runs[0]
run.text = 'Curriculum Vitae'
document.save('CV.docx')
Doing this changes the text, but leaves all the style information the same. Alright, now we now how to edit text. It’s more tricky than one might expect, but it does work!
Dealing with text boxes
Let’s say that next we want to edit the text box on the right-hand side of the document, and add a skill to our list of skills. We’ve been diving into the inner workings of Word documents, so it’s fair to say we know how to use Microsoft Word, so let’s add the skill “Microsoft Word” to the list.
To do this we first want to figure out in which paragraph this information is stored. We can do this by going through all the paragraphs in the document and looking for the text “Skills”.
import re
pattern = re.compile("Skills")
for p in document.paragraphs:
    if pattern.search(p.text):
        print("Found the paragraph!")
        break
else:
    print("Did not find the paragraph :(")
Output
Did not find the paragraph :(
Seems like there is unfortunately no matching paragraph! This is because the paragraph we want is inside a text box, and modifying text boxes is not supported in
The first step is understanding how text boxes are encoded in the XML. It turns out that the structure is something like this:
<mc:AlternateContent>
    <mc:Choice Requires="wps">
        <w:drawing>
            <wp:anchor>
                <a:graphics>
                    <a:graphicData>
                        <wps:txbx>
                            <w:txbxContent>
                            ...
                            <w:txbxContent>
                        </wps:txbx>
                    </a:graphicData>
                </a:graphics>
            </wp:anchor>
        </w:drawing>
    </mc:Choice>
    <mc:Fallback>
        <w:pict>
            <v:textbox>
                <w:txbxContent>
                ...
                <w:txbxContent>
            </v:textbox>
        </w:pict>
    </mc:Fallback>
</mc:AlternateContent>
The insides of the two
Next we need to figure out how to manipulate these word objects. My idea is to create a
class TextBoxContent(BlockItemContainer)Given an
XPATH_CHOICE = "./mc:Choice/w:drawing/wp:anchor/a:graphic/a:graphicData//wps:txbx/w:txbxContent"
XPATH_FALLBACK = "./mc:Fallback/w:pict//v:textbox/w:txbxContent"
Then making a rudimentary
class TextBox(ElementProxy):
        """Implements texboxes. Requires an `<mc:AlternateContent>` element."""

    def __init__(self, element, parent):
        super(TextBox, self).__init__(element, parent)

        try:
            (tbox1,) = element.xpath(XPATH_CHOICE)
            (tbox2,) = element.xpath(XPATH_FALLBACK)
        except ValueError as err:
            raise ValueError(
                "This element is not a text box; it should contain precisely two
                    ``<w:txbxContent>`` objects"
            )
        self.tbox1 = TextBoxContent(tbox1, self)
        self.tbox2 = TextBoxContent(tbox2, self)
So far this is just good for storing the text box, we still need some code to actually manipulate it. It would also be great if we have a way to find all the text boxes in a document. This is as simple as finding all the
def find_textboxes(element, parent):
    """
    List all text box objects in the document.

    Looks for all ``<mc:AlternateContent>`` elements, and selects those
    which contain a text box.
    """
    alt_cont_elems = element.xpath(".//mc:AlternateContent")
    text_boxes = []
    for elem in alt_cont_elems:
        tbox1 = elem.xpath(XPATH_CHOICE)
        tbox2 = elem.xpath(XPATH_FALLBACK)
        if len(tbox1) == 1 and len(tbox2) == 1:
            text_boxes.append(TextBox(elem, parent))
    return text_boxes
We then update the
@property
def textboxes(self):
    """
    List all text box objects in the document.
    """
    return find_textboxes(self._element, self)
Now let’s test this out:
document = Document("resume.docx")
document.textboxes
This gives output:
[<docx.oxml.textbox.TextBox at 0x7faf395c3bc0>,
<docx.oxml.textbox.TextBox at 0x7faf395c3100>]
Now to manipulate the “Skills” section as we initially wanted, we first find the right paragraph. Since the two
import re
def find_paragraph(pattern):
    for textbox in document.textboxes:
        for i,p in enumerate(textbox.paragraphs):
            if pattern.search(p.text):
                return textbox,i
pattern = re.compile("Skills")
textbox, i = find_paragraph(pattern)
print(textbox.paragraphs[i].text)
Output
Skills
Now to insert a new skill, we need to create a new paragraph with the text “Microsoft Word”. For this we can find the paragraph right after, and this paragraphs
style = document.styles['Skillsentries']

pattern = re.compile("Research")
textbox,i = find_paragraph(pattern)

p1 = textbox.tbox1.paragraphs[i]
p2 = textbox.tbox2.paragraphs[i]

for p in (p1,p2):
    p.insert_paragraph_before("Microsoft Word", p.style)
document.save("CV.docx")
When now opening the Word document, we see the item “Microsoft Word” in my list of skills, with the right style and everything. I did cheat a little; I needed to make some additional technical changes to the code for this all to work, but the details are not super important. If you want to use this feature, you can use my fork of python-docx. My solution is still a little hacky, so I don’t think it will be added to the main repository, but it does work fine for my purposes.
Conclusion
In summary, we can use Python to edit word documents. However the
While I now have all the tools available to automatically update my CV using Python, I will actually refrain from doing it. It is a lot of work to set up properly, and needs active maintenance ever time I would want to change the styling of my CV. Probably it’s a better idea to just manually edit it every time I need to. Automatization isn’t always worth it. But I wouldn’t be surprised if this new found skill will be useful at some point in the future for me.
Other posts you may like
Rik Voorhaar © 2026